Getting started
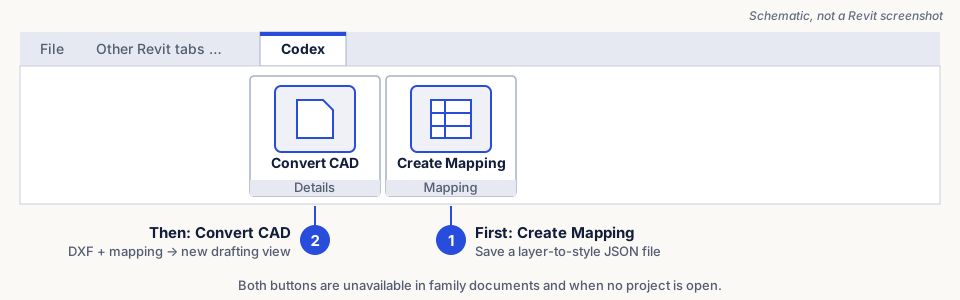
Before you begin
- Revit 2025 / .NET 8 development build from the prototype maintainer. Revit 2022 onward is a future requirement, not current coverage. This site is not an installer or download channel.
- A disposable project from the firm template that already contains the approved line styles, text types and filled-region types. Codex never creates replacement styles.
Ribbon missing? See the ribbon fix.
Prepare a DXF
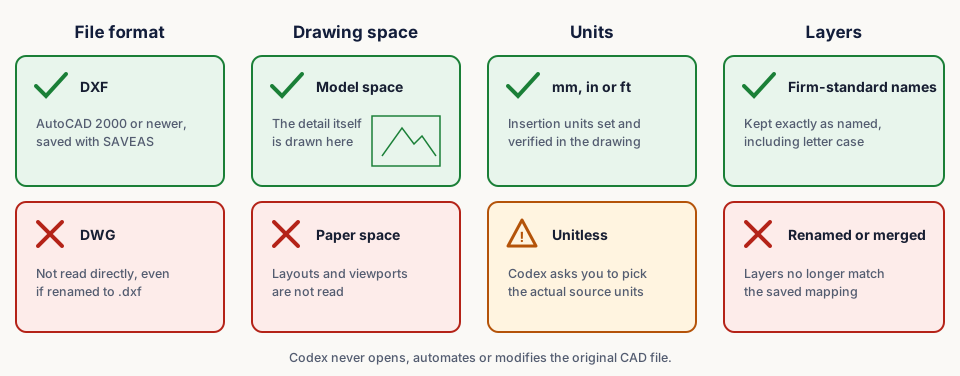
- In your CAD editor, use SAVEAS to save a copy as DXF.
- Confirm the detail is in model space and the units are set.
- Check supported input. Mapping a layer does not make an unsupported entity convertible.
Codex never launches or modifies AutoCAD or the original CAD file. Keep real CAD and Revit files local and out of the documentation repository.
Prepare Revit
- Open the disposable project (not a family document) with drafting views available.
- Codex › Mapping › Create Mapping: follow the mapping walkthrough.
- Codex › Details › Convert CAD: follow the conversion walkthrough.
For a first smoke test, ask the maintainer for the wholly synthetic test input. Never substitute a client drawing.