Create a mapping
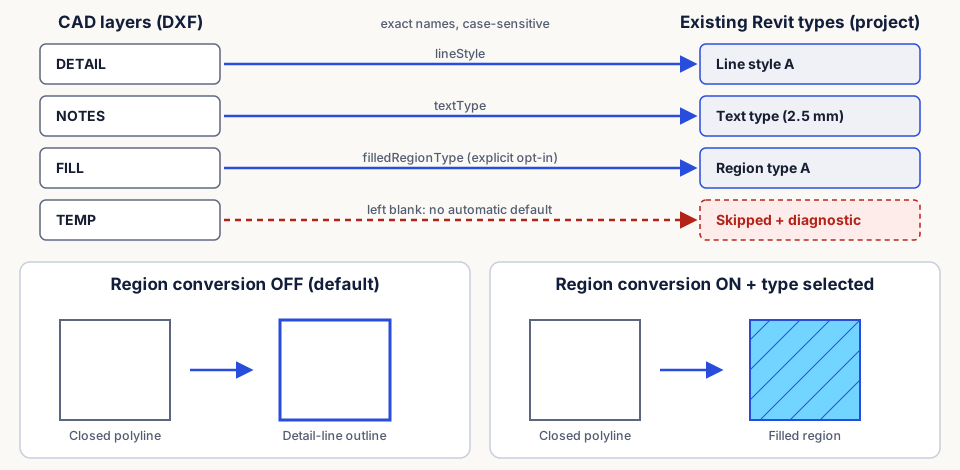
A mapping is a small local JSON file that points each CAD layer at an existing Revit style or type by its exact name. It contains no geometry.
Walkthrough
Open a project made from the firm template (or one containing a vetted drafting detail), choose Codex › Mapping › Create Mapping, and select the DXF.
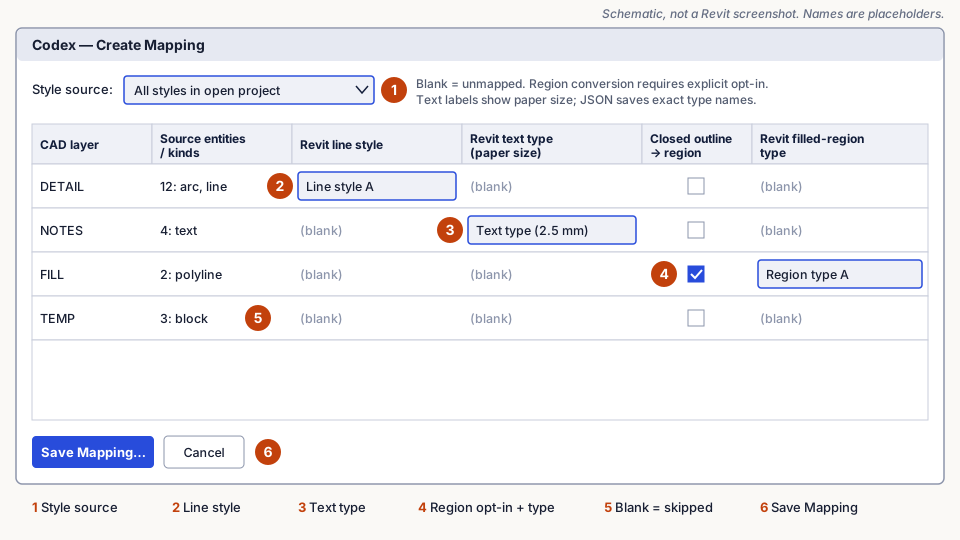
- Style source: All styles in open project, or Only styles used in active drafting view (available only from a drafting view).
- Line style for layers with lines, arcs and polylines.
- Text type for text layers. Labels show paper size and font; the file stores exact type names.
- Closed outline → region only where closed polylines should become fills, then pick a filled-region type.
- Leave unwanted layers blank. They are skipped with diagnostics.
- Save Mapping… Replacing an existing file asks for confirmation.
Then run Convert CAD with the same DXF and this mapping.
Creating a mapping only reads the project. Choices start blank; nothing is name-matched automatically. Changing the style source clears choices that are no longer available and shows a notice.
Rules to remember
- Names match exactly, including case.
- Leave region conversion off for ordinary linework; on turns a closed outline into a fill.
- A region needs a selected type. An entirely empty mapping cannot be saved.
- The layer list covers model-space entities only; nested block content and unused layers are not listed.
- Reuse a mapping only in projects with the same approved styles.
- To edit a saved mapping, use a JSON editor; the window creates new mappings.
JSON shape
Placeholders, not real firm names:
{
  "layers": {
    "DETAIL": {
      "lineStyle": "EXACT EXISTING LINE STYLE NAME",
      "textType": "EXACT EXISTING TEXT TYPE NAME"
    },
    "FILL": {
      "filledRegionType": "EXACT EXISTING FILLED REGION TYPE NAME"
    }
  }
}
Include only properties relevant to each layer. Target names missing? See troubleshooting.